Published Apr 11, 2025
Connect webcentral domain to squarespace dns
Learn how to connect your Webcentral domain to Squarespace in a few easy steps. Follow this step-by-step guide to update DNS records and successfully link your domain for a seamless website launch.
In Webcentral
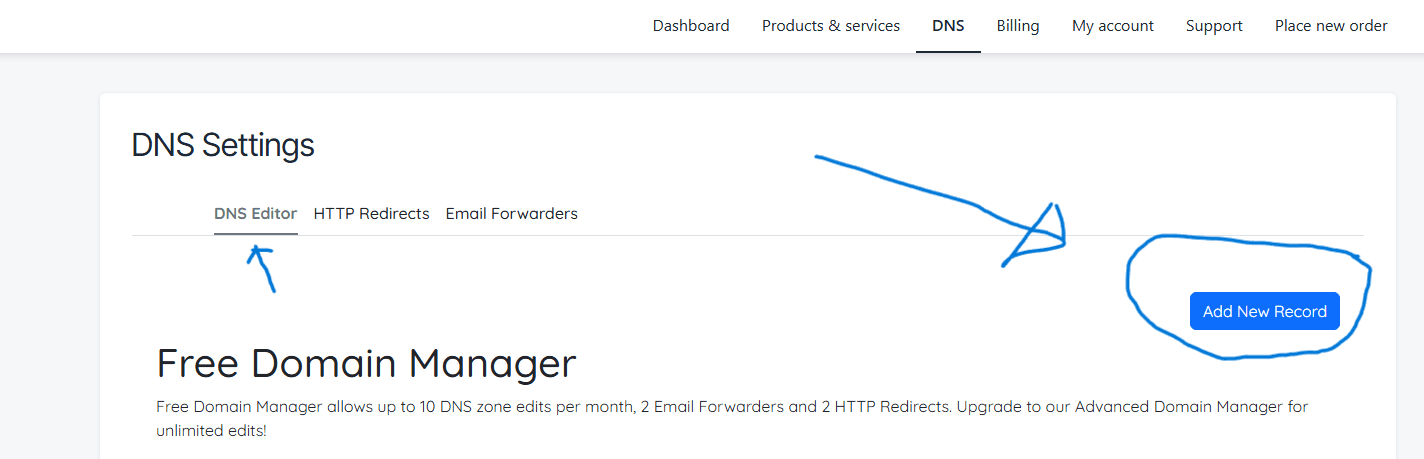
1. Access the DNS Settings
Log in to your Webcentral account and navigate to the DNS tab.

2. Open the DNS Editor
Click on the DNS Editor tab and select Add New Record.
3. Add DNS Records from Squarespace
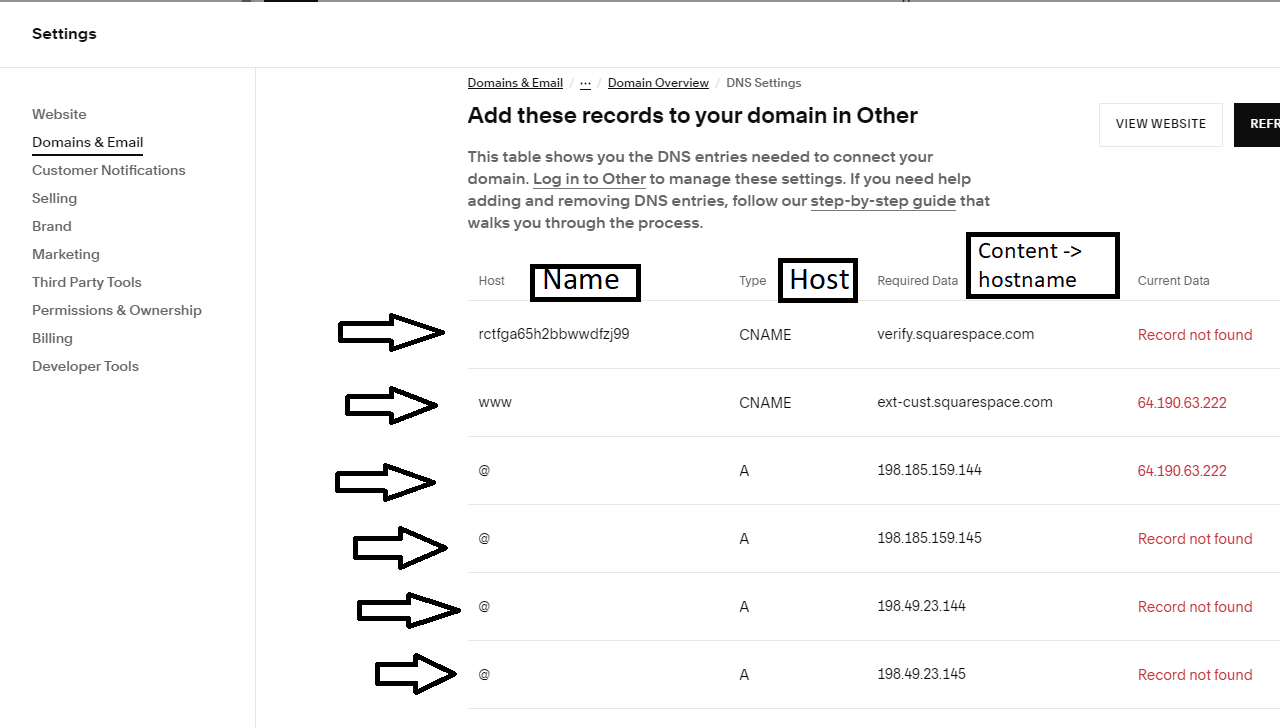
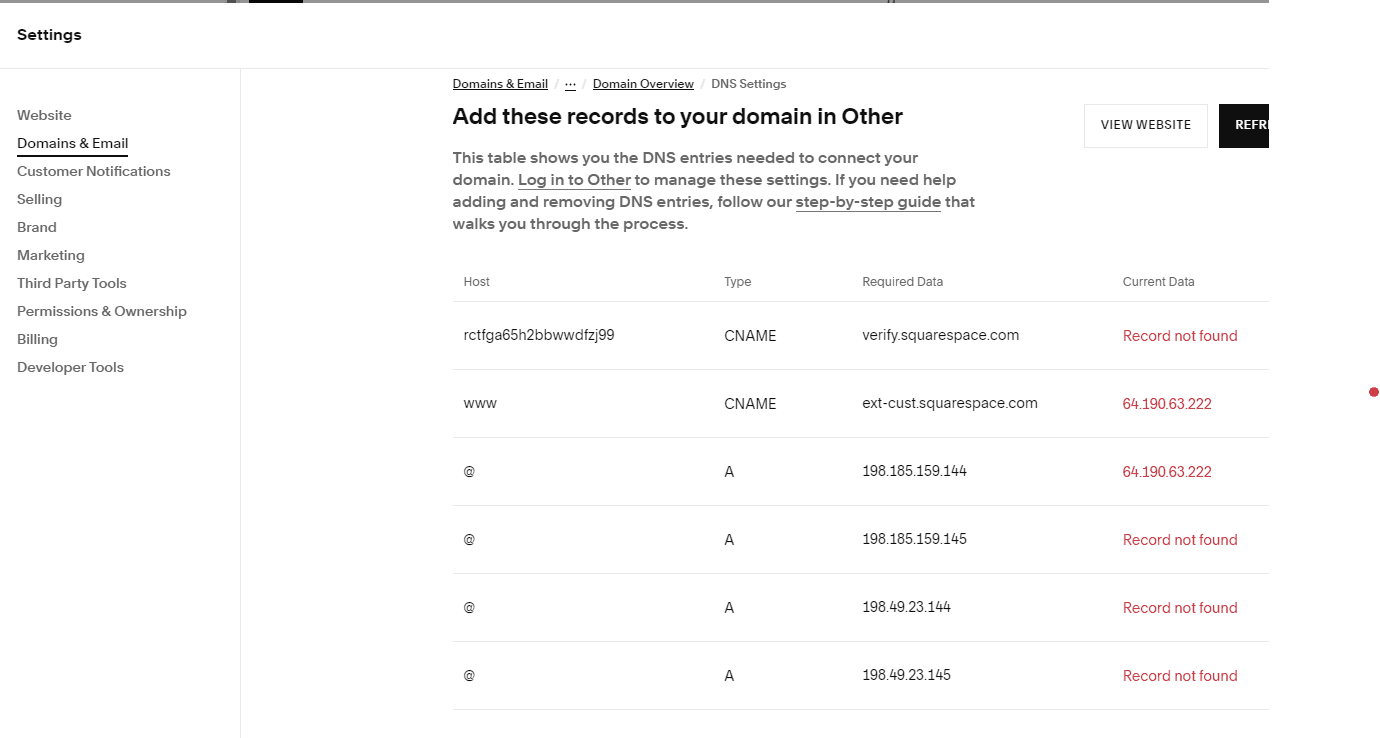
DNS Records from Squarespace. Read the content below to know how to get these records.
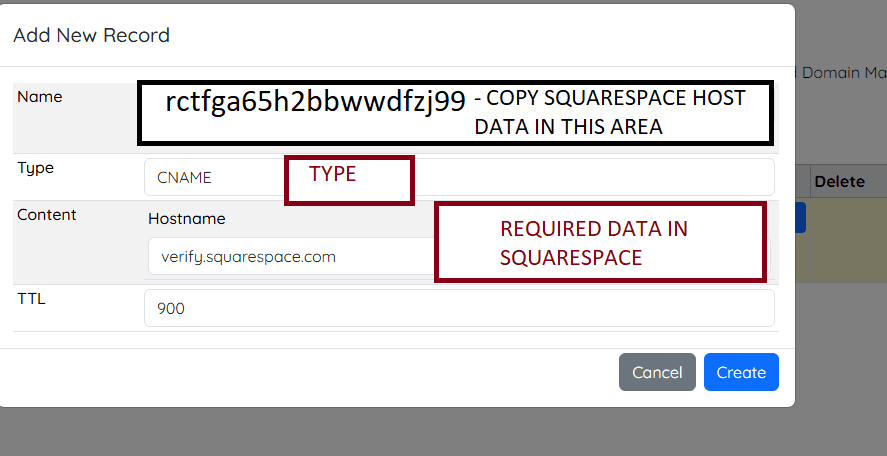
Refer to the DNS details provided in your Squarespace dashboard (as shown in the image). You will need to input each row of information into your Webcentral DNS editor.
For every record listed:
- Use the value under the Host column from Squarespace as the Name in Webcentral.
Important: If the Host value is @, leave the Name field blank in Webcentral, as it does not support the @ symbol.
- Use the value under Required Data as the Content or Hostname.
- Match the Type (e.g., A, CNAME).
Click Create after entering each record, and repeat this process for all rows shown in the table—do not skip any. This ensures a complete and successful domain connection.
4. Verify the Connection
A successful connection will be indicated by a green Record Found status next to each entry. Note that changes may not take effect immediately. You can leave the records as they are and check back later—ensure that all entries eventually display Record Found in green.

How to add a custom domain in Squarespace
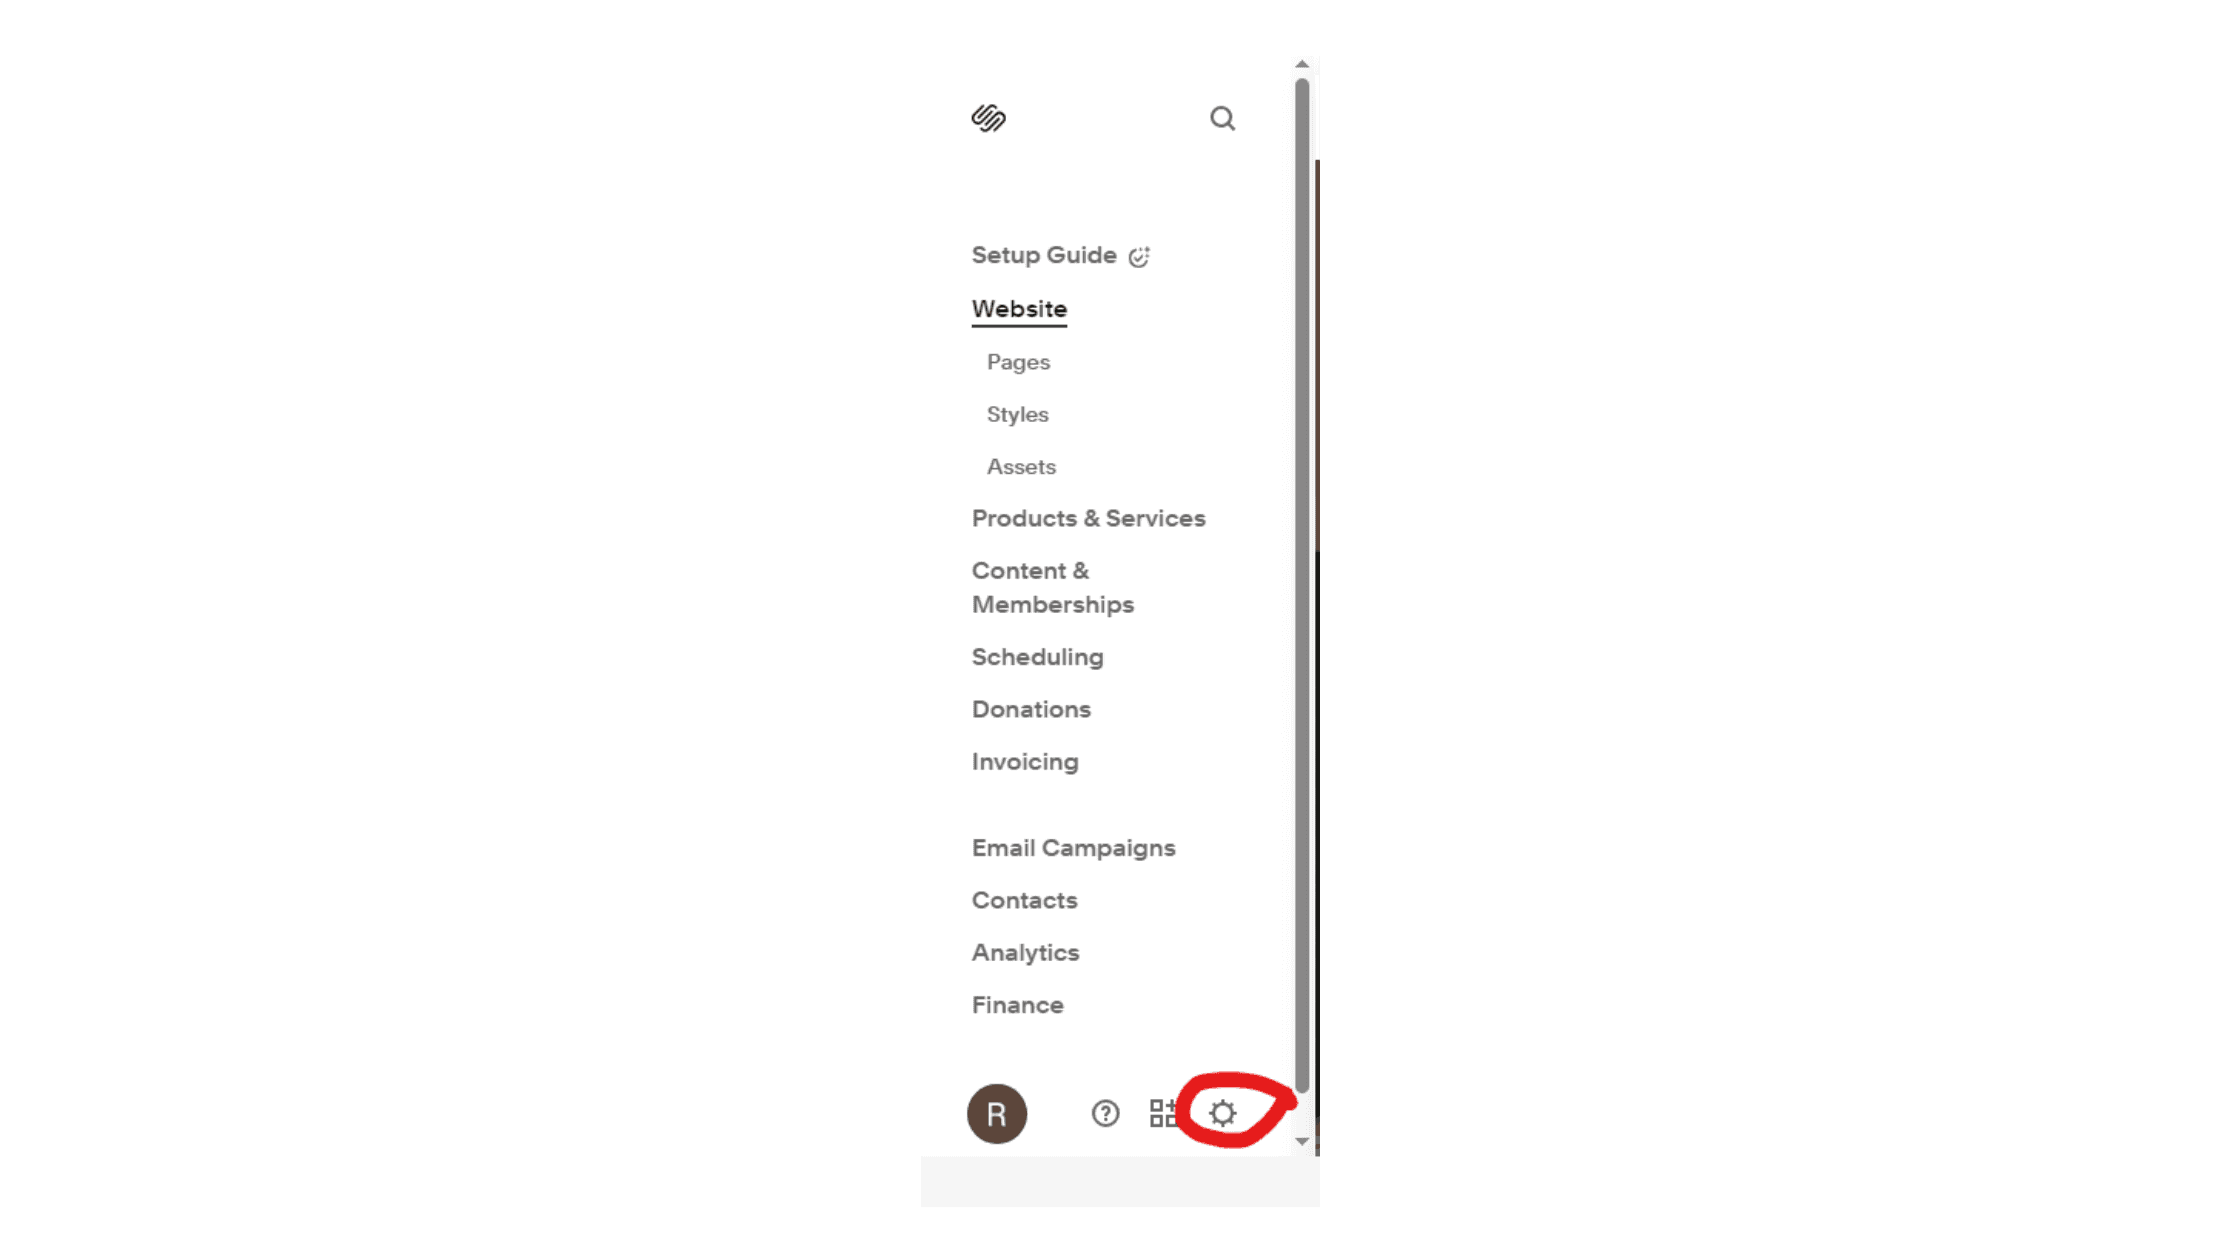
1. Go to Domains Settings
From your Squarespace dashboard, click Settings, then navigate to the Domains and Email tab. Select Domains from the list.
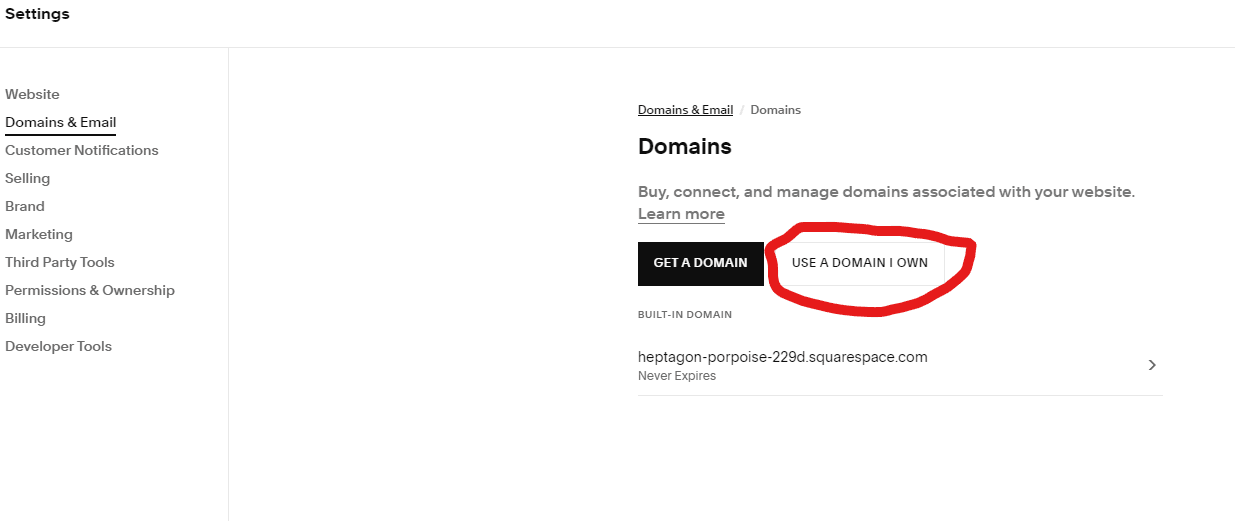
2. Connect Your Existing Domain
Click the Use a Domain I Own button.
3. Enter Your Domain
Type your purchased Webcentral domain into the input field and click Connect Domain.
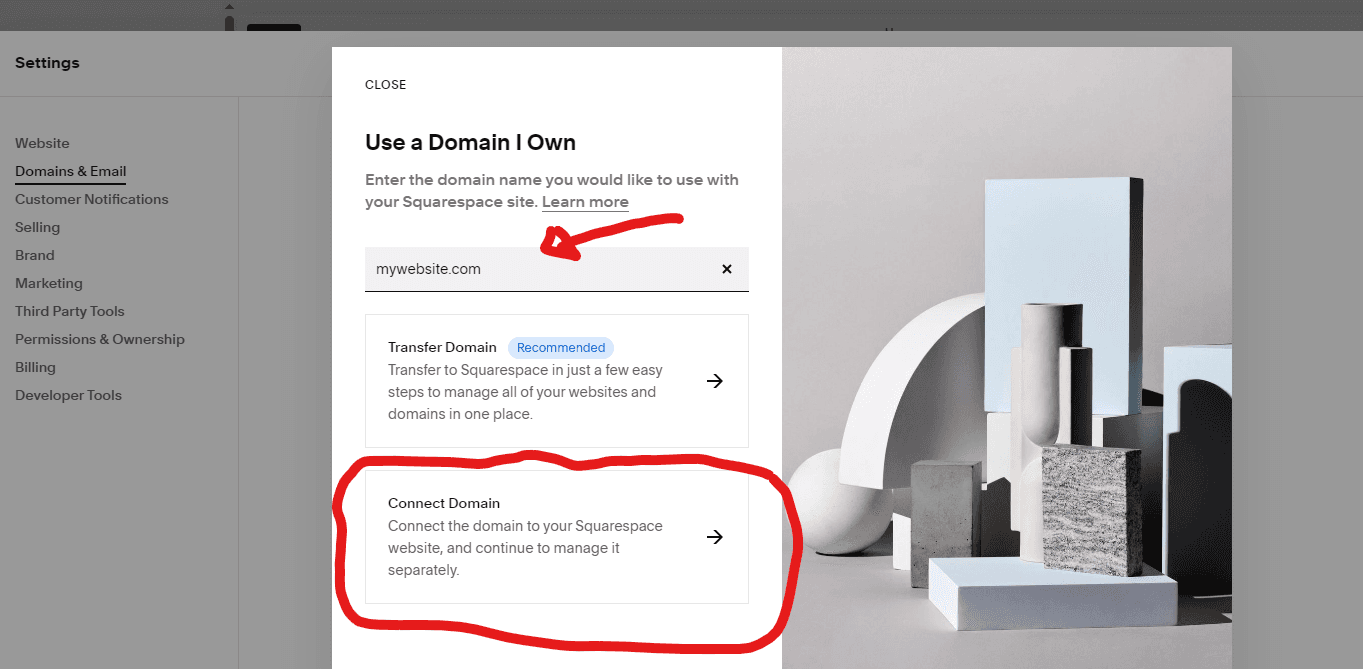
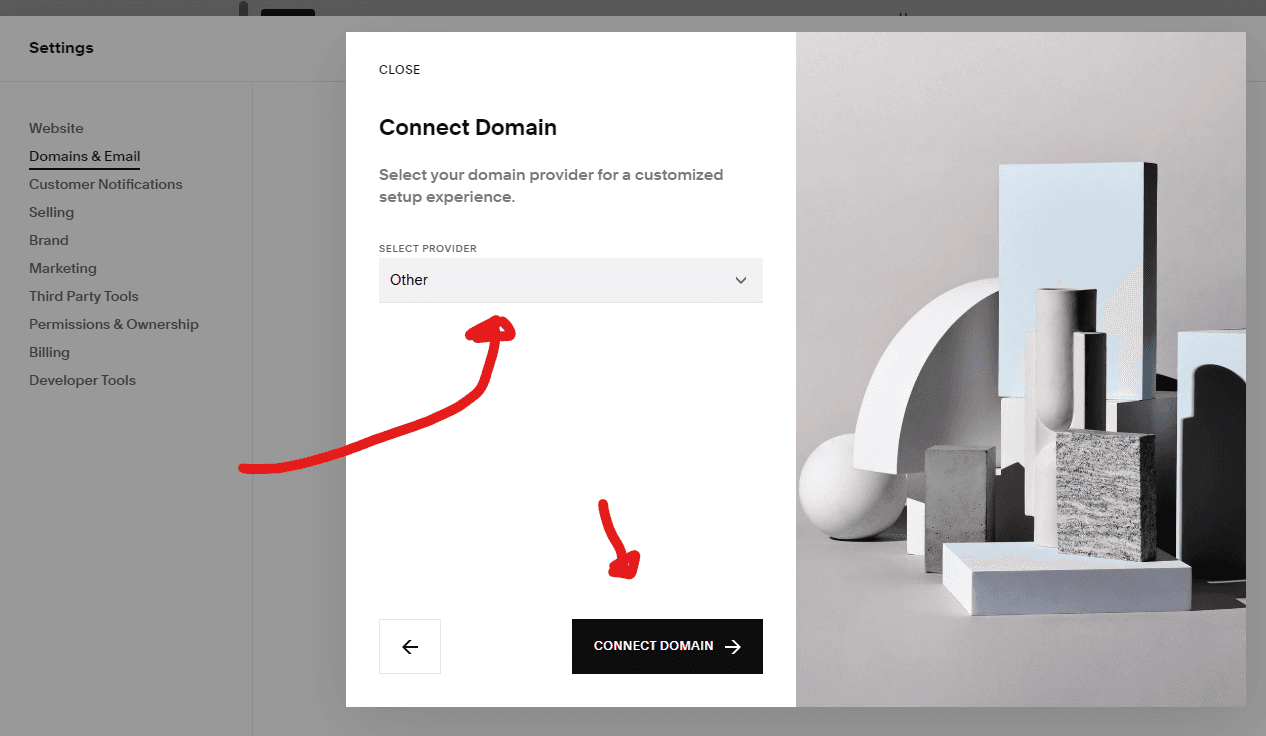
4. Choose Your Provider
Since Webcentral is not currently listed as a provider, select Other. However, it’s a good idea to check if Webcentral has been added to the list before proceeding. Click Connect.
Domain, then click Continue if a pop-up appears.
5. Retrieve DNS Records
You will now see a list of DNS records provided by Squarespace. These should be copied and added to your Webcentral DNS settings as described in the earlier steps.