
Published Apr 18, 2025
How to Add Table in WordPress: A Complete Guide
Learn how to add table in WordPress using the built-in block editor, HTML, or plugins like TablePress. Follow this step-by-step guide to create responsive and customizable tables on your WordPress site easily.

Adding a table in WordPress is easier than you might think. Whether you want a simple layout or advanced table features like sorting and filtering, WordPress has multiple options to suit your needs.
In this tutorial, you’ll learn how to add a table in WordPress using three easy methods.
Method 1 – How to Add Table in WordPress Using the Built-in Table Block (Beginner-Friendly)
The WordPress Block Editor (Gutenberg) includes a native Table block that makes creating tables quick and easy.
Steps:
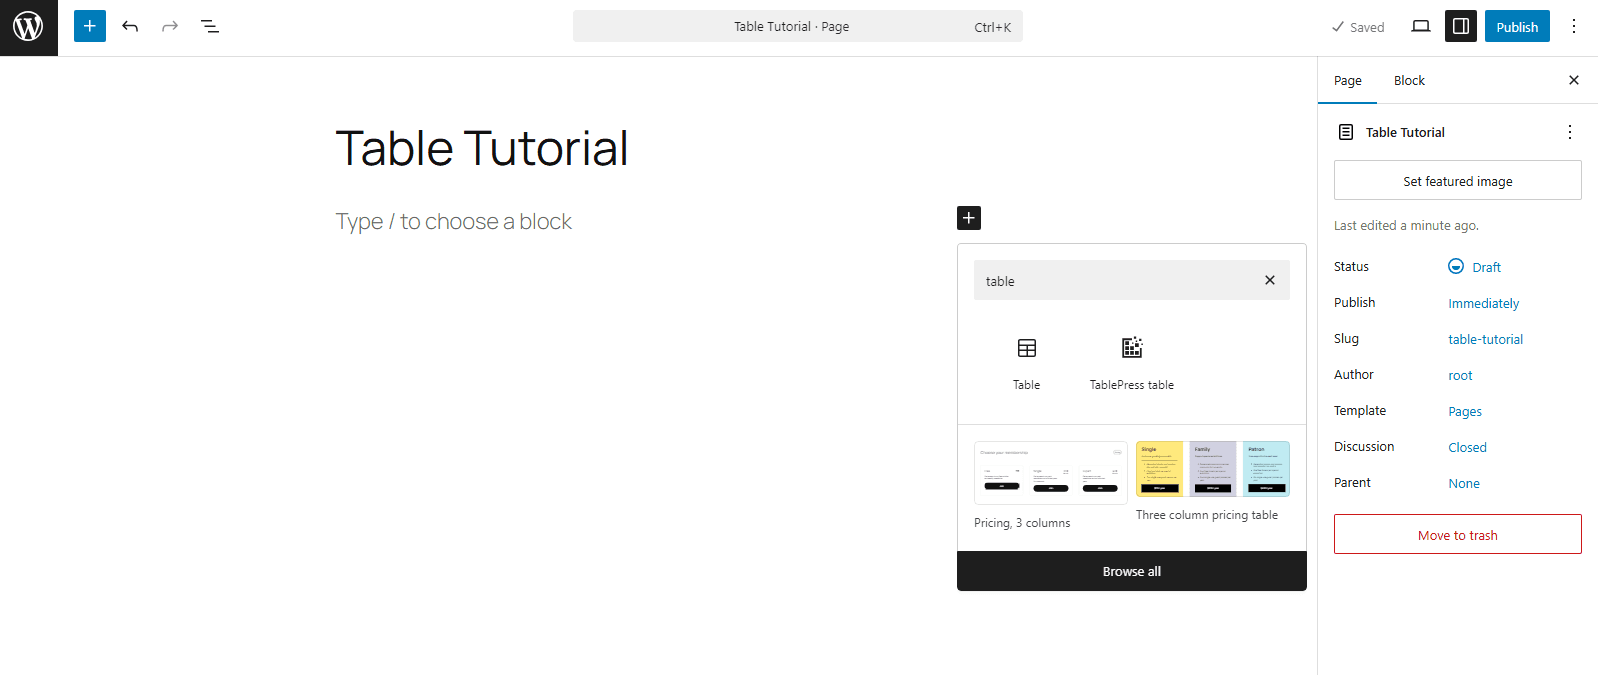
1. Open the WordPress editor for your post or page.
2. Click the "+" button to add a new block.
3. Search for “Table” or find it in the Formatting section.
4. Choose the number of columns and rows you want.
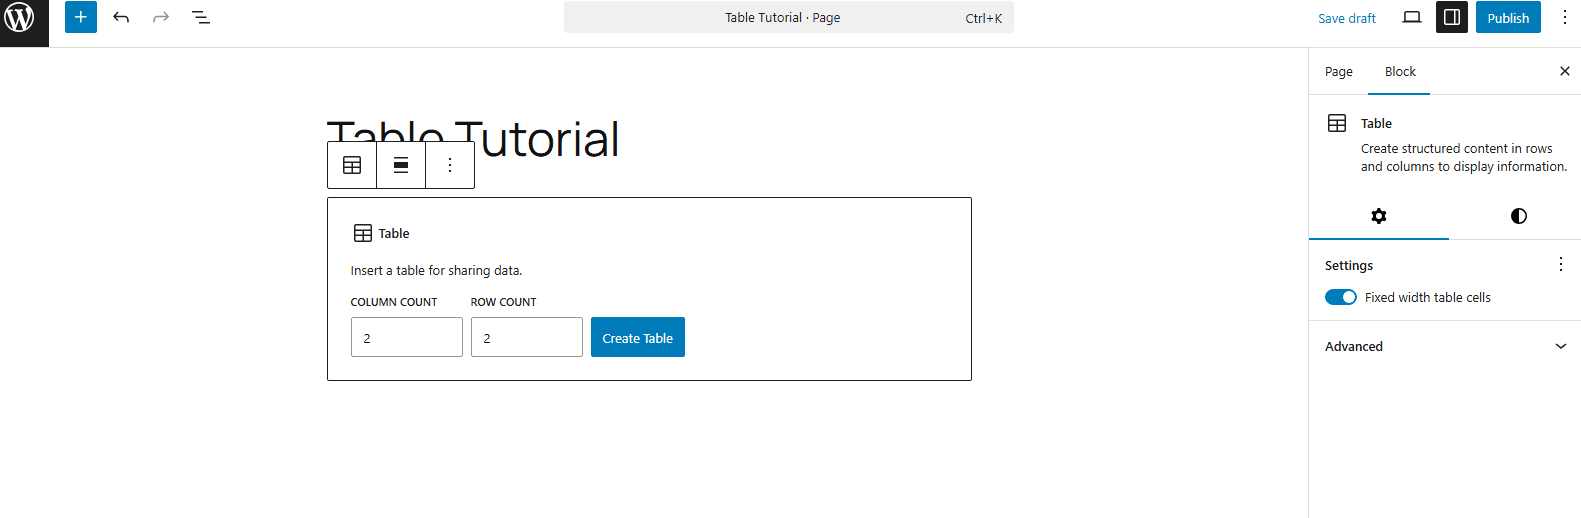
5. Add your content to each cell.
Use the toolbar to customize table settings (alignment, color, style).
This method is perfect for beginners and works well for simple data presentation.
Method 2 – How to Add Table in WordPress Using a Plugin (For More Features)
If you need advanced functionality like sortable columns, responsive tables, or import/export, using a plugin is the best choice.
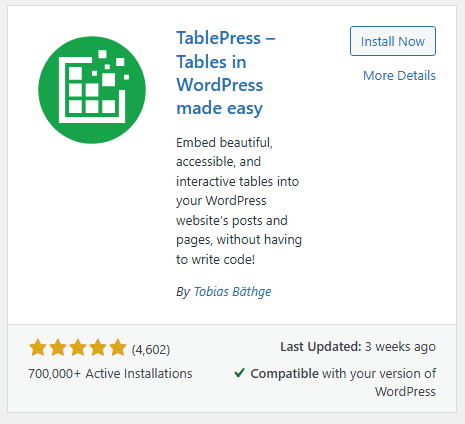
Recommended Plugins:
Steps:
1. Go to Plugins > Add New in your WordPress dashboard.
2. Search for a table plugin like “TablePress” or "WP Table Builder".
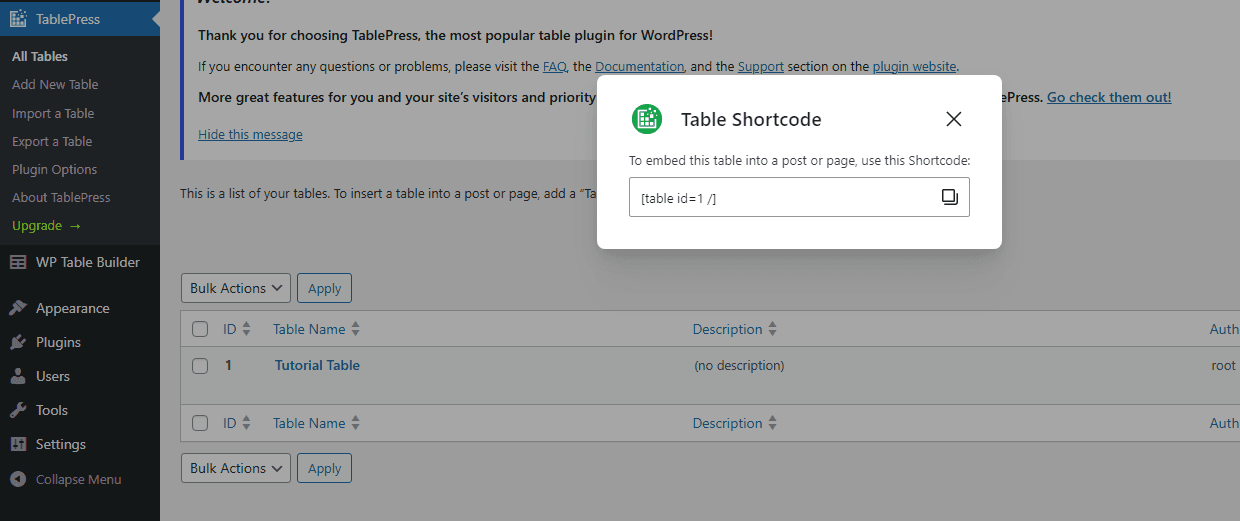
3. Install and activate the plugin.
4. Follow the plugin’s instructions to create your table.
5. Insert your table into any post or page using a shortcode or block provided by the plugin.
These plugins offer advance features, responsive design, and custom styling options.
Method 3 – How to Add Table in WordPress Using HTML (For Advanced Users)
If you're comfortable with HTML, you can manually code your table for full control over its structure and appearance.
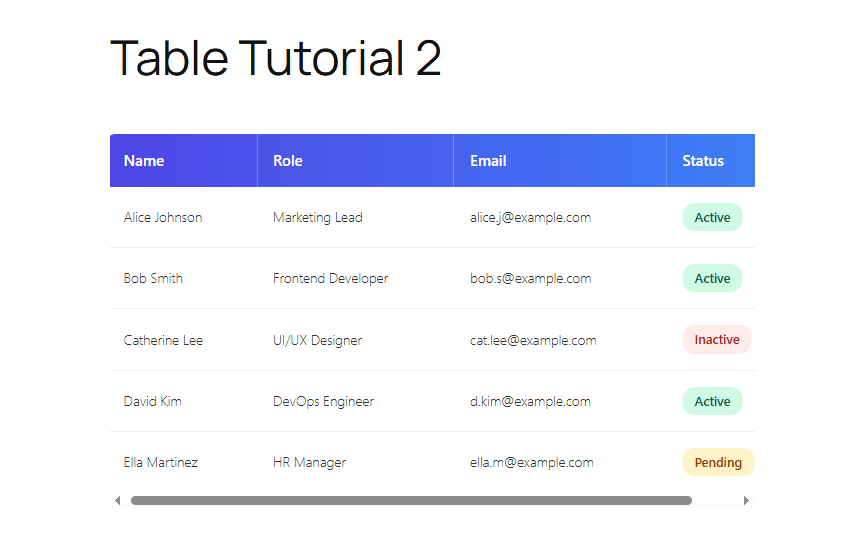
Output of the code below
Steps:
Block Editor Steps (Gutenberg):
1. Open your page or post in the WordPress Block Editor.
2. Click the plus (+) icon to add a new block.
3. Search for “HTML” and select the Custom HTML block.
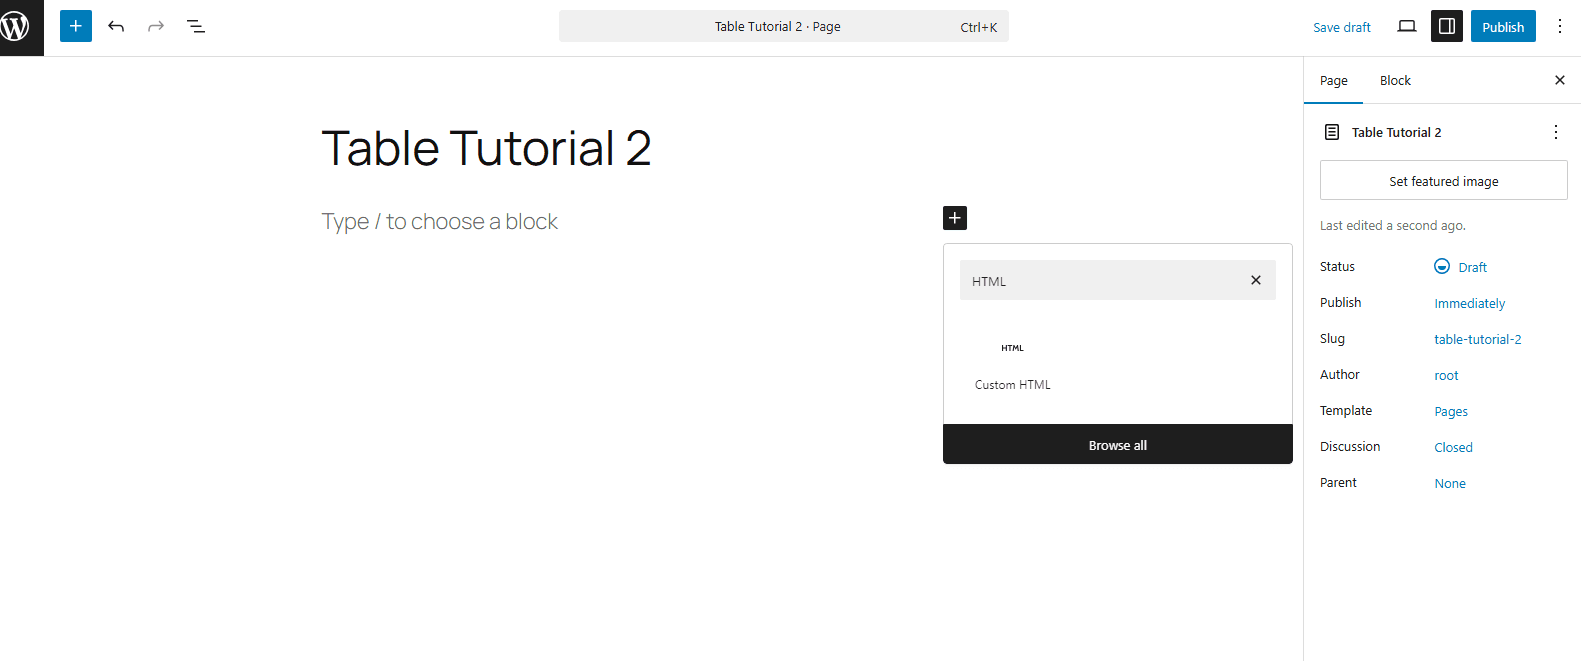
4. Paste your table code (HTML + CSS) inside the block.
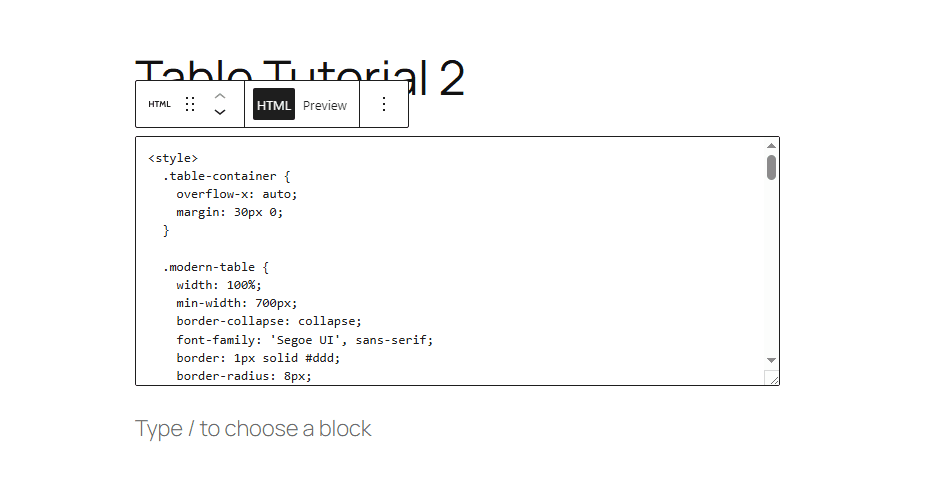
Example HTML Table Code:
<style>
  .table-container {
    overflow-x: auto;
    margin: 30px 0;
  }

  .modern-table {
    width: 100%;
    min-width: 700px;
    border-collapse: collapse;
    font-family: 'Segoe UI', sans-serif;
    border: 1px solid #ddd;
    border-radius: 8px;
    overflow: hidden;
  }

  .modern-table thead {
    background: linear-gradient(to right, #4f46e5, #3b82f6); /* Gradient header */
    color: white;
  }

  .modern-table thead th {
    padding: 16px;
    text-align: left;
    font-size: 15px;
    font-weight: 600;
  }

  .modern-table tbody td {
    padding: 16px;
    font-size: 14px;
    color: #333;
    border-bottom: 1px solid #eee;
  }

  .modern-table tbody tr:last-child td {
    border-bottom: none;
  }

  .modern-table tbody tr:hover {
    background-color: #f9fafb;
  }

  .badge {
    display: inline-block;
    padding: 5px 12px;
    font-size: 13px;
    border-radius: 12px;
    font-weight: 500;
    background-color: #d1fae5;
    color: #065f46;
  }

  .badge.inactive {
    background-color: #fdecea;
    color: #b91c1c;
  }

  .badge.pending {
    background-color: #fef3c7;
    color: #92400e;
  }
</style>

<div class="table-container">
  <table class="modern-table">
    <thead>
      <tr>
        <th>Name</th>
        <th>Role</th>
        <th>Email</th>
        <th>Status</th>
      </tr>
    </thead>
    <tbody>
      <tr>
        <td>Alice Johnson</td>
        <td>Marketing Lead</td>
        <td>alice.j@example.com</td>
        <td><span class="badge">Active</span></td>
      </tr>
      <tr>
        <td>Bob Smith</td>
        <td>Frontend Developer</td>
        <td>bob.s@example.com</td>
        <td><span class="badge">Active</span></td>
      </tr>
      <tr>
        <td>Catherine Lee</td>
        <td>UI/UX Designer</td>
        <td>cat.lee@example.com</td>
        <td><span class="badge inactive">Inactive</span></td>
      </tr>
      <tr>
        <td>David Kim</td>
        <td>DevOps Engineer</td>
        <td>d.kim@example.com</td>
        <td><span class="badge">Active</span></td>
      </tr>
      <tr>
        <td>Ella Martinez</td>
        <td>HR Manager</td>
        <td>ella.m@example.com</td>
        <td><span class="badge pending">Pending</span></td>
      </tr>
    </tbody>
  </table>
</div>
5. Click Preview to see how the table looks.
6. Publish or update your page when you're ready.
Using Elementor:
1. Open your page with Elementor Editor.
2. In the widgets panel, search for “HTML”.
3. Drag and drop the HTML widget to your desired section.
4. Paste your table code inside the editor. (Paste the sample code above)
5. Elementor will render the table live in the preview.
Final Thoughts on Adding Tables in WordPress
Now that you know how to add table in WordPress, choose the method that best suits your needs:
- Use the Table Block for quick and simple tables.
- Install a plugin for more features and flexibility.
- Write HTML for full customization and control.
Whichever method you use, tables are a great way to organize and present information clearly on your WordPress site.